Before you are able to start adding content to a course in Gele, you must first create it in the Superadmin Dashboard. Gele gives you the option to either create a brand new course from scratch or create a clone of an existing course to edit. Cloning a course helps speed up the process of creating couress by giving you a template of slides already created that you can edit.
To jump to instructions for Cloning a Course, click here.
Creating a New Course from Scratch
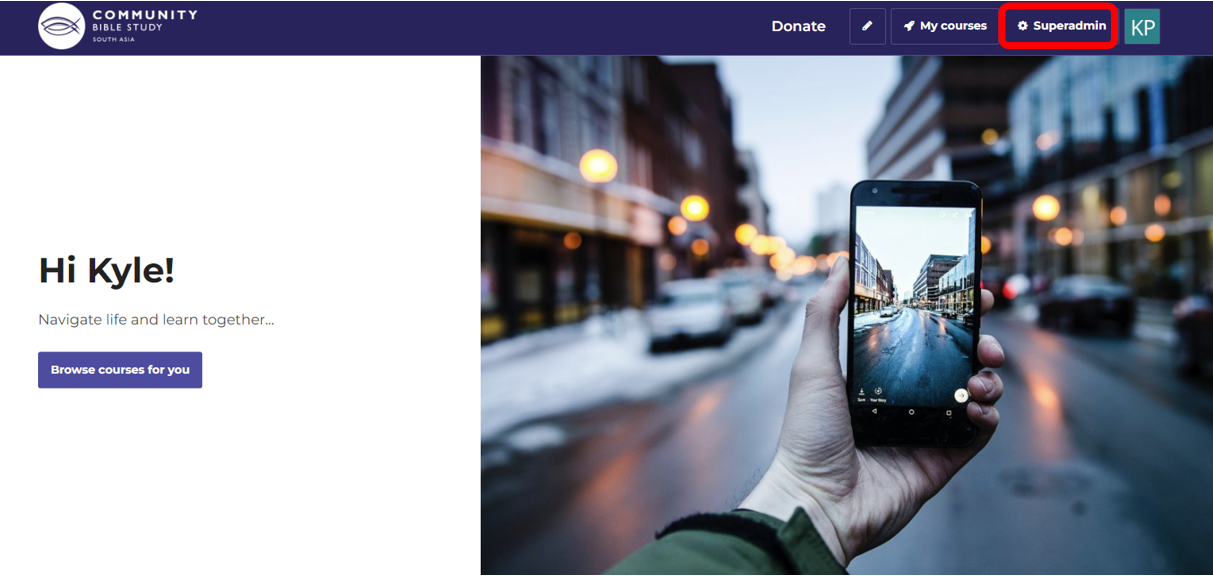
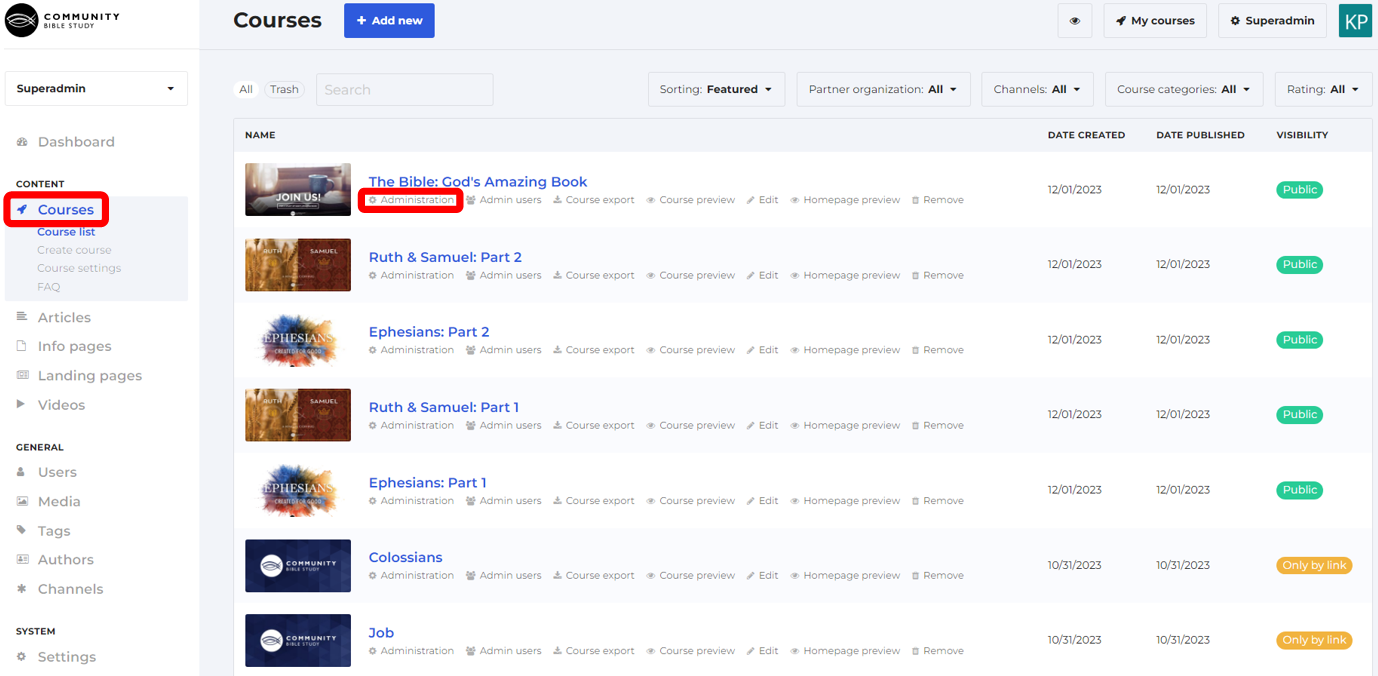
1. Login to your account in the platform and click Superadmin at the top of the page.
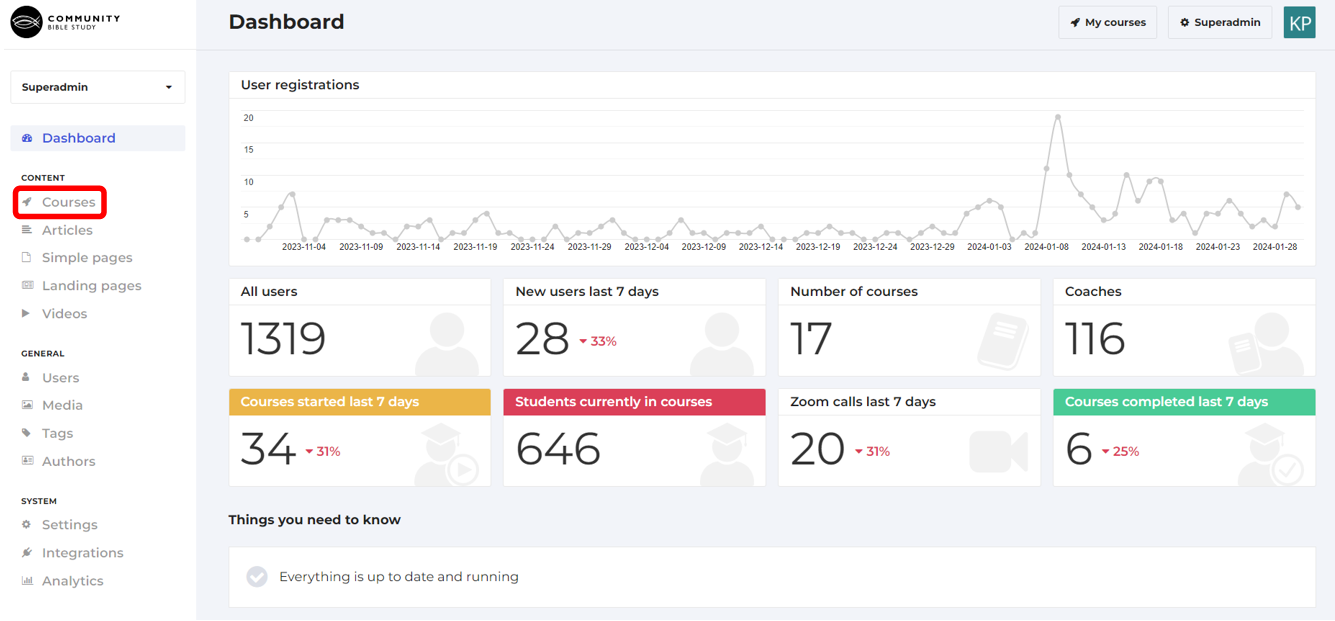
2. Select Courses from the menu on the left-hand side of the page.
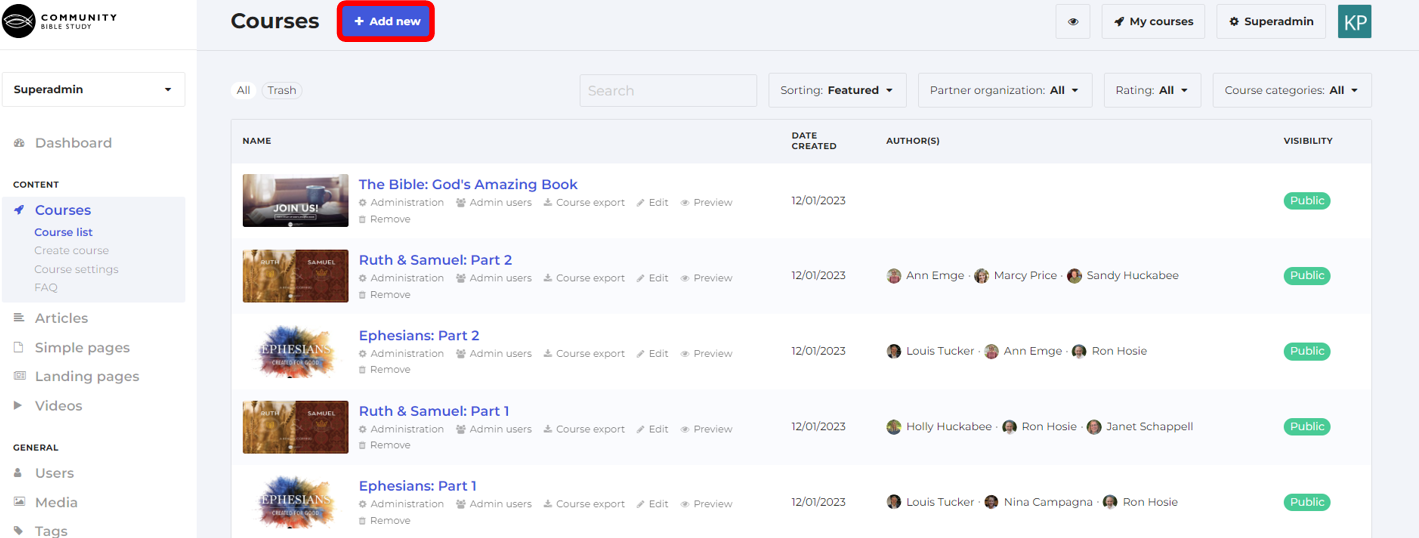
3. Click Add new at the top of the page.
4. Enter your course’s name in the ‘Name’ field.
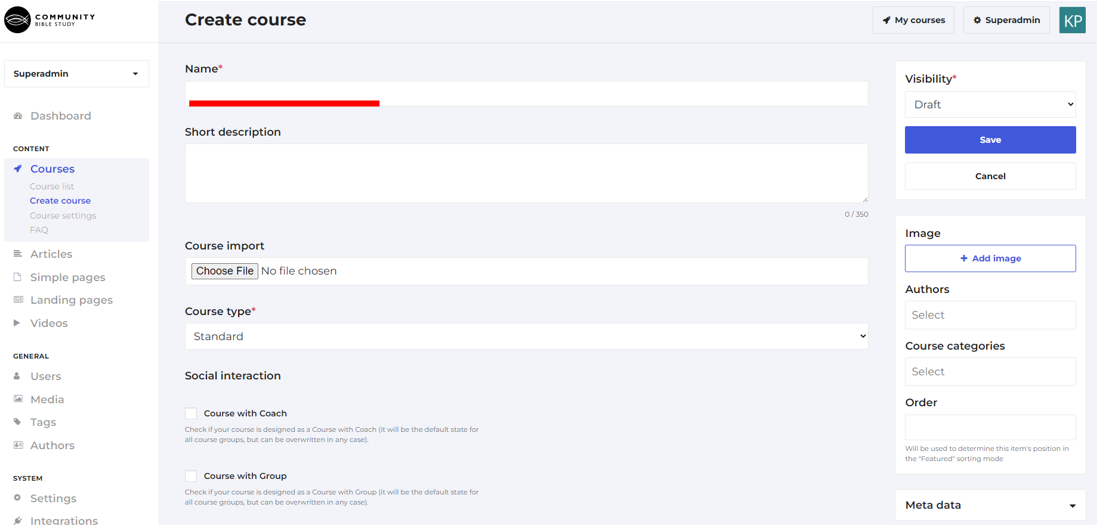
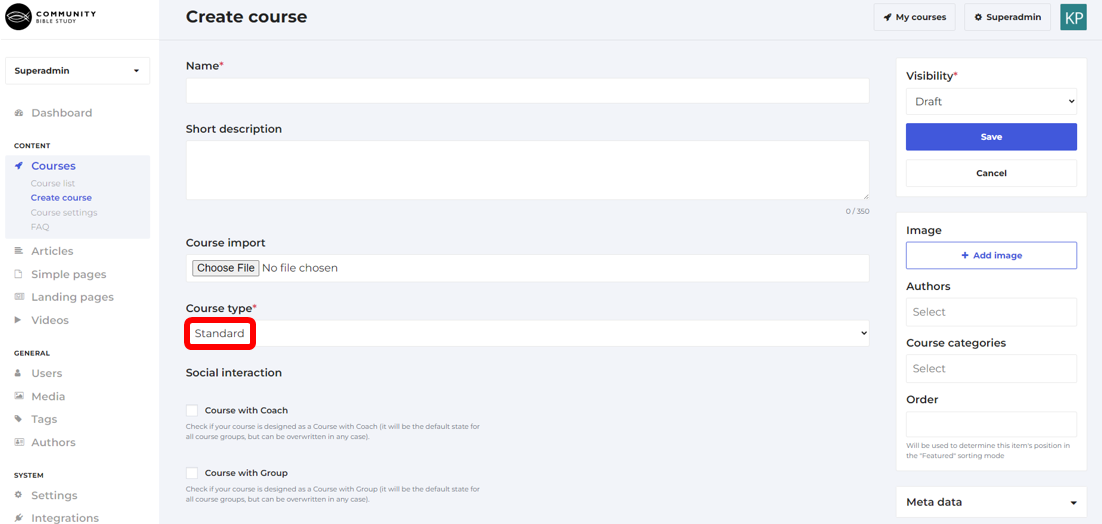
5. Make sure the Course type is set to Standard.
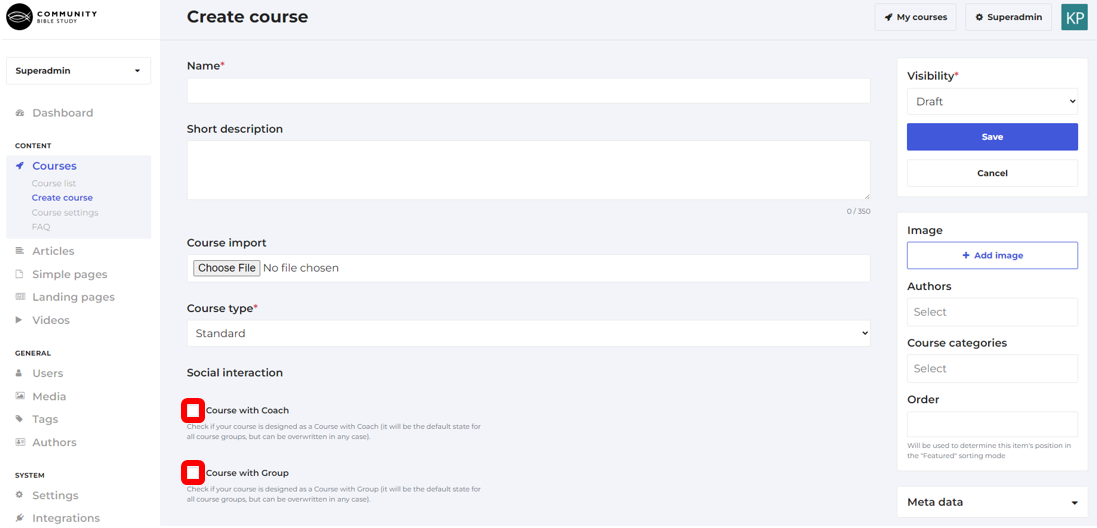
6. Check the Course with Coach and Course with Group checkboxes.
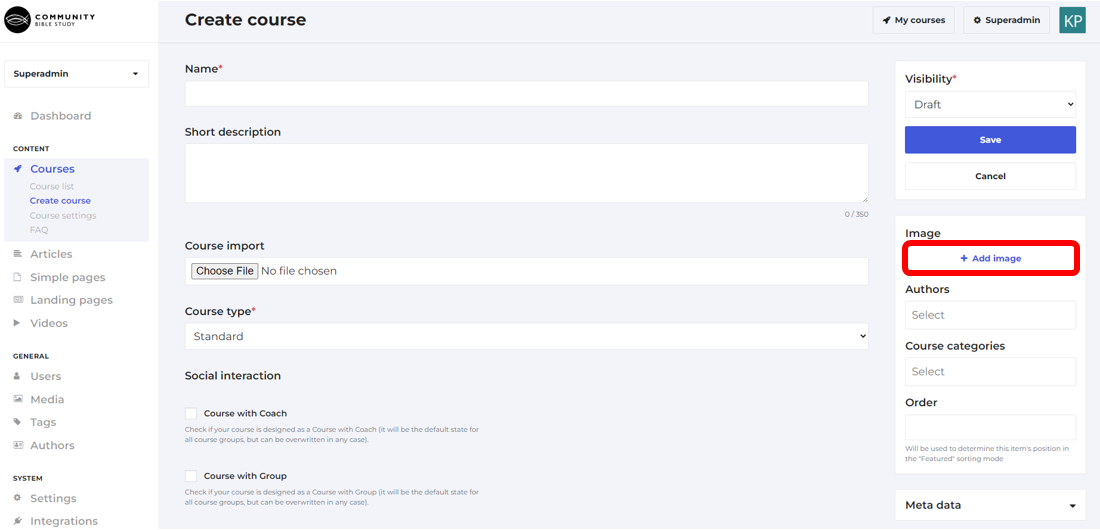
7. If you have an image you would like to upload for the course, click the Add Image on the right side of the page and select the image you would like to upload.
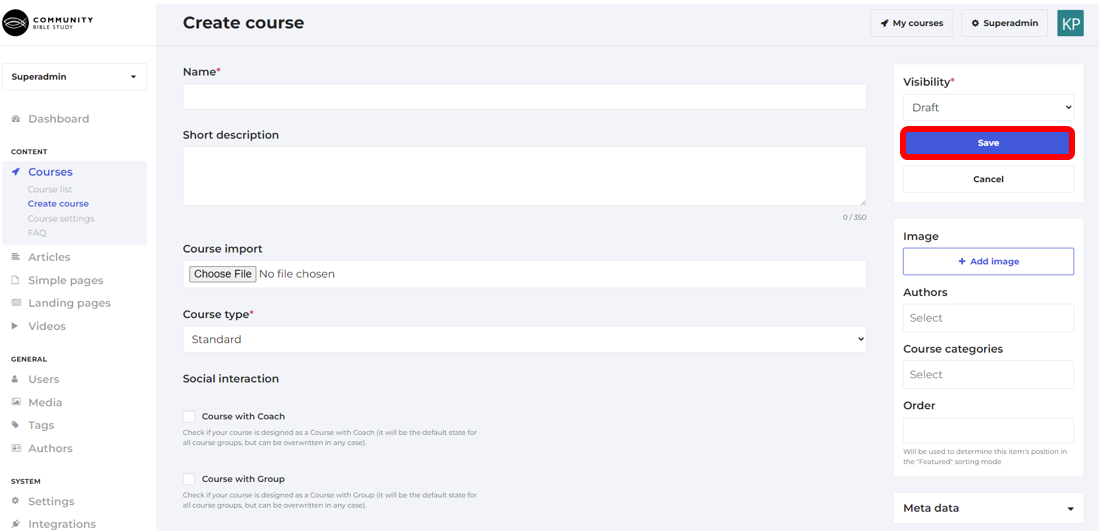
8. Click Save to create the new course.
9. Once you click save, your new course will appear on the ‘Courses’ page in the Superadmin Dashboard. From this page, you can click Administration to go into the back end of the course and start adding content to the course.
Cloning a Course in Gele
1. Login to your account in the platform and click Superadmin at the top of the page.
2. Select Courses from the menu on the left-hand side of the page.
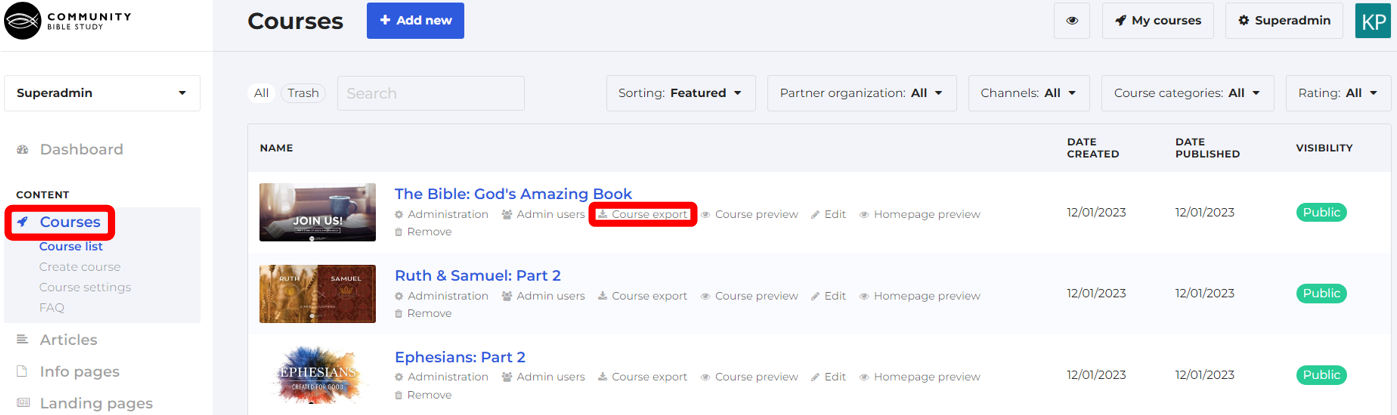
3. Click Course export underneath the course you are wanting to clone. This will download a .json file of the course to your computer.
4. Once you’ve downloaded the .json file for the course you want to clone, click Add new at the top of the page to create a new course.
5. Enter your course’s name in the ‘Name’ field.
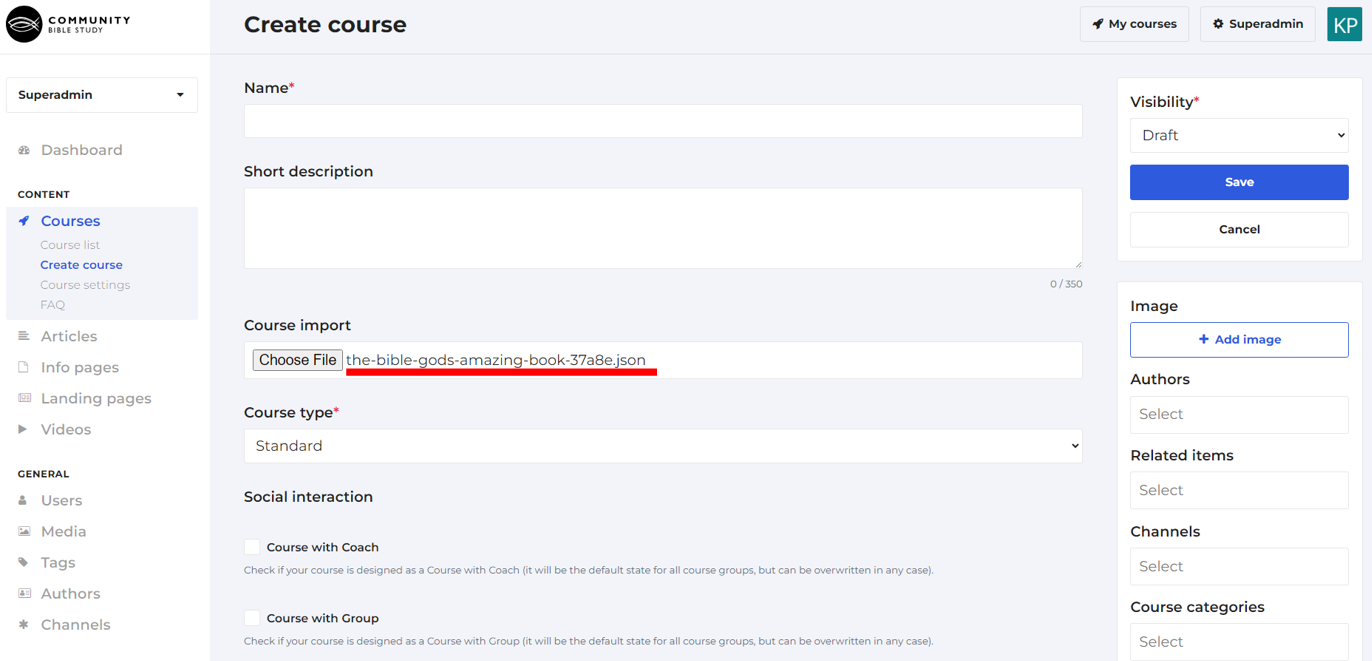
6. In the ‘Course Import’ box, click Choose File and select the .json file that you downloaded to your computer. Once you upload the file you should see the file name in the box.
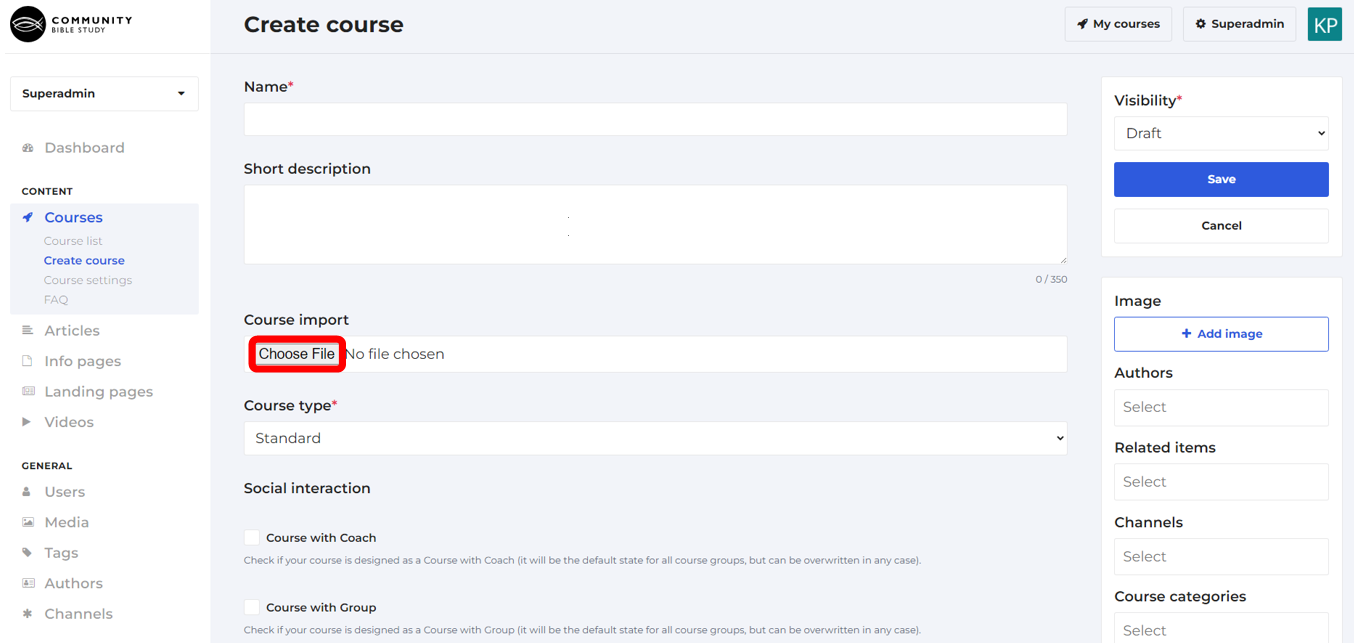
7. Make sure the Course type is set to Standard.
8. Check the Course with Coach and Course with Group checkboxes.
9. If you have an image you would like to upload for the course, click the Add Image on the right side of the page and select the image you would like to upload.
10. Click Save to create the new course.
11. Once you click save, your new course will appear on the ‘Courses’ page in the Superadmin Dashboard. From this page, you can click Administration to go into the back end of the course and start adding content to the course.